
This DIY Landscaping post is sponsored by Lowe’s Home Improvement on behalf of The UpSkill Project. All thoughts and opinions are my own.

DIY – do those three letters cause you anxiety or get your blood pumping? For me, it’s a little of both. Before each DIY project my husband and I tackle, there’s this fear of the unknown. Will we know what we’re doing? What happens when something goes wrong (because something always goes wrong)? Will the results match what I see in my mind?
When we were younger, we would just dive in headfirst and figure it out as we went. As we’re getting older, we get stuck in analysis paralysis and end up overthinking or underthinking every DIY situation and as a result, projects sit unfinished.
This is the plight of many homeowners and DIY wannabes. Where do you begin? And how do you make sure you’re set up for success?
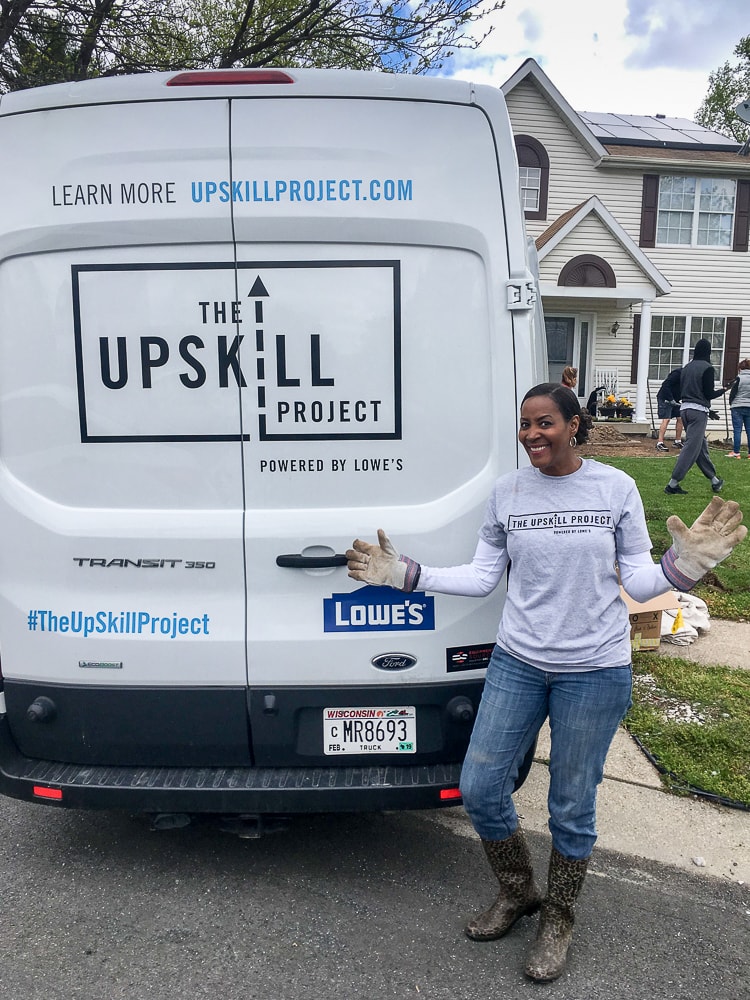
That’s the entire goal of The UpSkill Project.
What if the biggest barrier to taking on home improvement projects was just having the confidence to do it yourself? The UpSkill Project gives homeowners the ability to shape their homes and transform their lives through skill-based learning. Whether it’s fixing a leaky faucet or building a fire pit, you can join other confident DIYers across the country who have learned more than 250 skills. We believe this is your time to join a movement of empowered and confident DIYers who are revitalize their homes and communities.
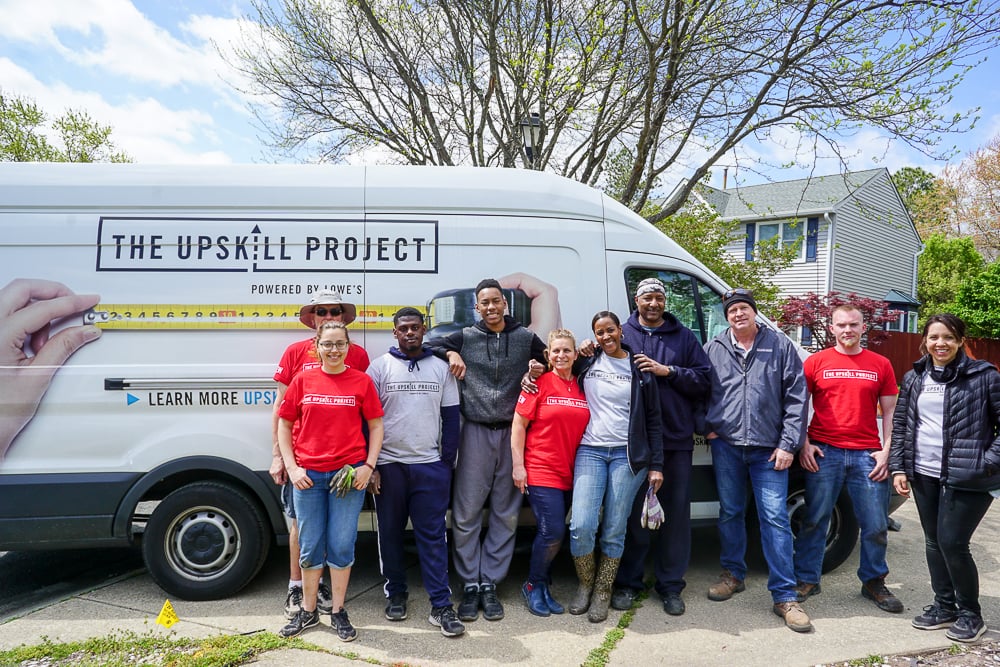
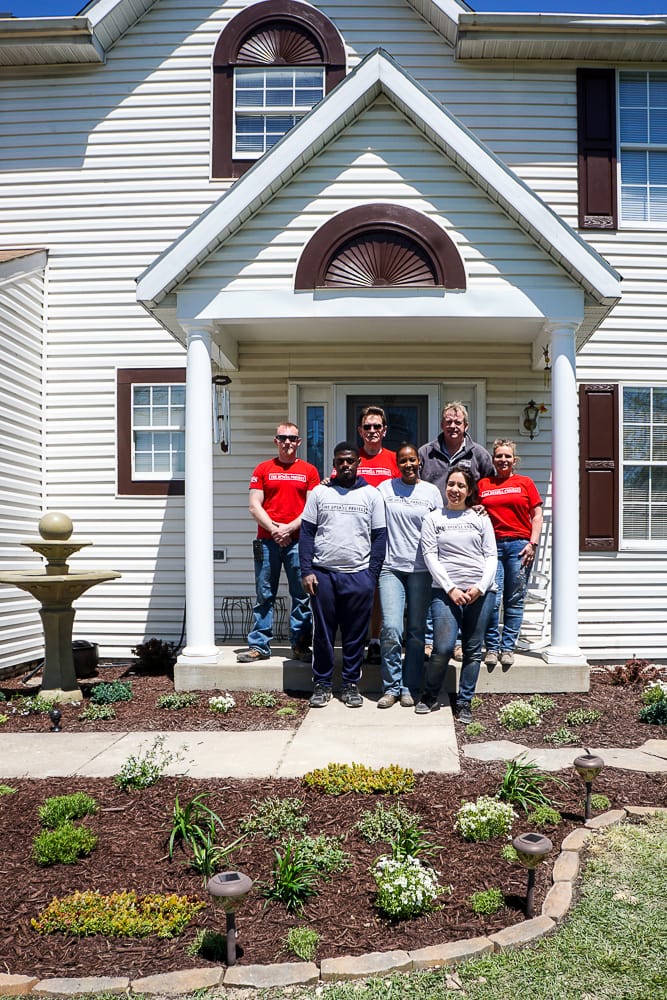
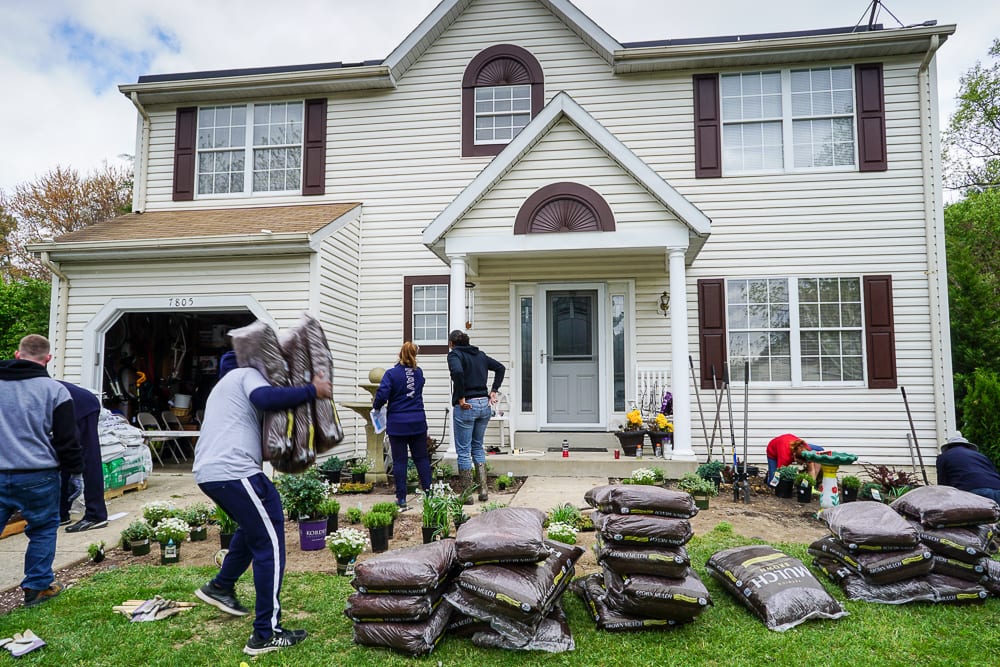
The UpSkill Project recently came to Baltimore and selected 5 grand prize winners, gifting them a $2000 gift card to Lowe’s Home Improvement and sending a team of “Red Vests” – local Lowe’s experts – to help them complete their project. In the process, each homeowner learned valuable skills and found the confidence to tackle new DIY projects on their own.
Want to know how I know? I got to spend two days with local winner, Diane Bullock, and her team of experts from the Lowe’s Home Improvement Store in Severn, MD!
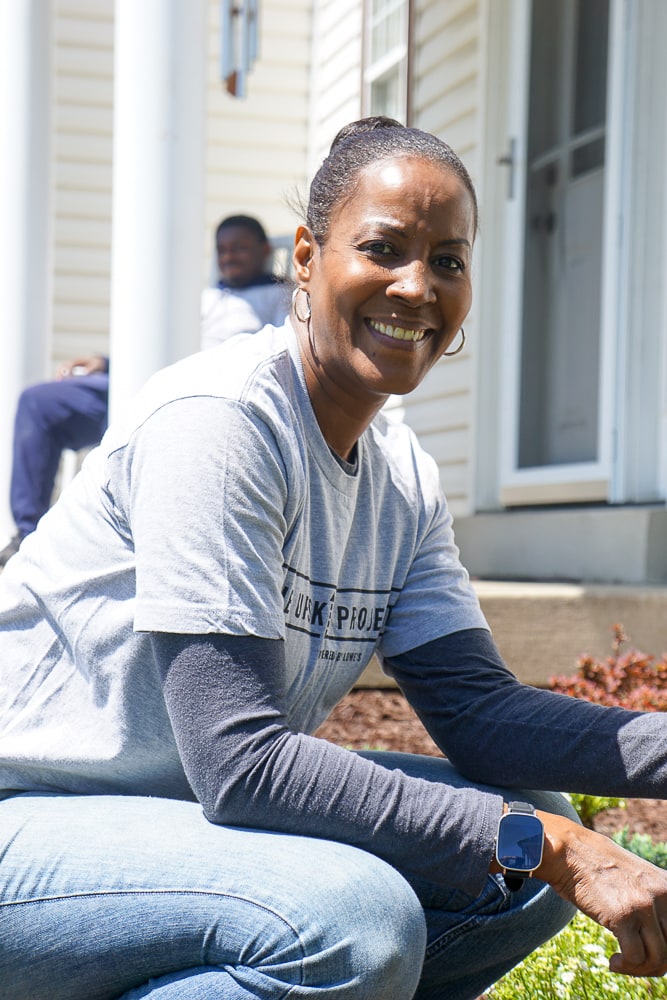
In Diane’s contest entry, she pleaded for help in making a retreat out of her front yard. She had tried in vain for years to make a change with the hardscape and the plants and nothing was working. Her yard was plagued by the full hot sun and nothing wanted to thrive or survive.
So where do you begin if you feel like you’ve already done it all in vain? Here are 10 easy ways to feel like a pro when it comes to DIY Landscaping in your own front yard.
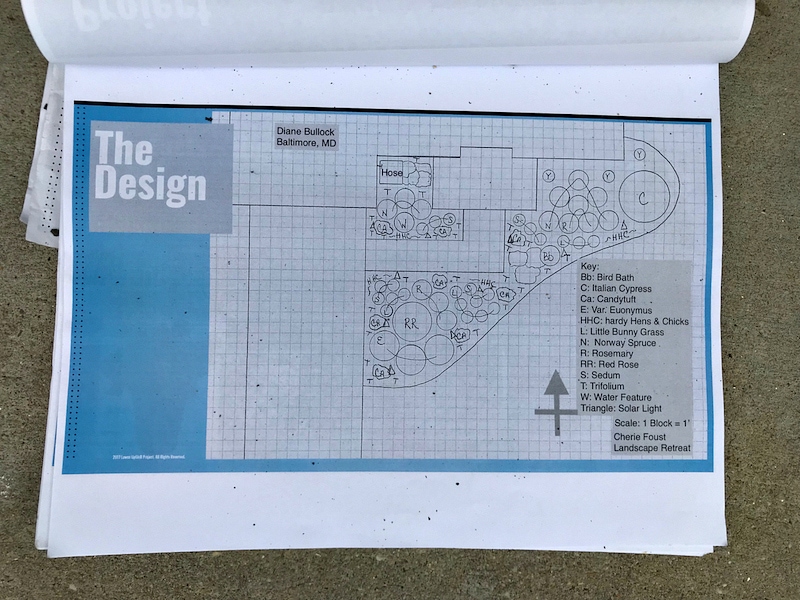
1. Have a landscape plan.
Diane met with a landscaping expert at Lowe’s who asked her questions about her yard, her soil, and what kind of environment she was looking to create. In return, she was given a diagram of her yard along with plant recommendations, including plant types and placement.
2. Be flexible with your plan.
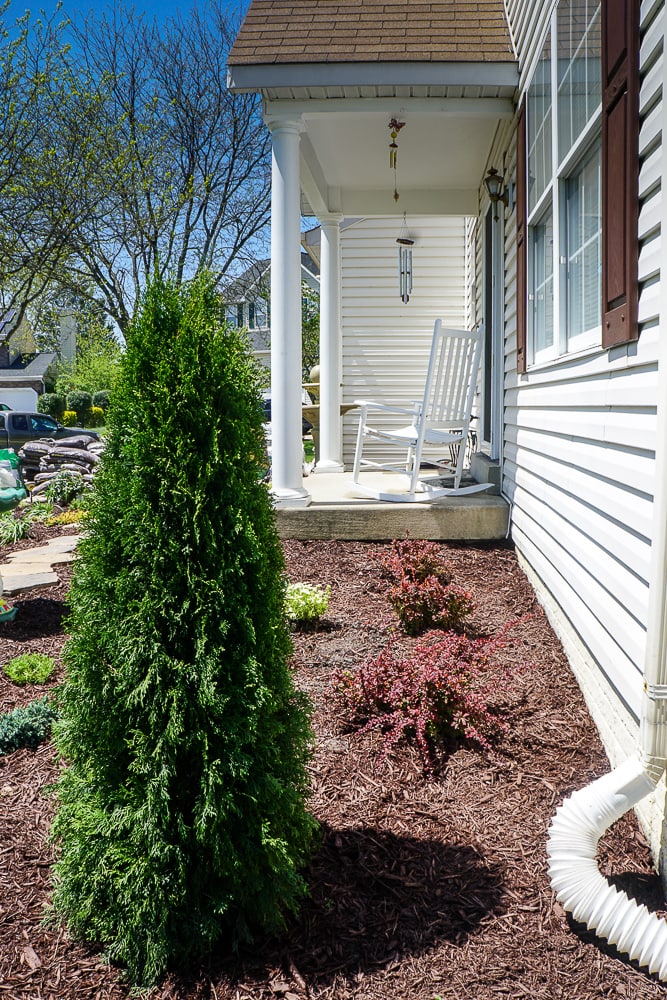
When Diane went to purchase the plants for her yard, she found alternative plants that she thought might add a better aesthetic. For example, she replaced a tall, skinny Italian Cypress with a fuller Pyramidal Arborvitae. Luckily, the Lawn & Garden team at Lowe’s helped her make the right substitutions for her landscape plan.
3. Enlist your helpers.
While Diane had a team of experts from Lowe’s to come and help her with her project, we don’t all have that luxury. So enlist friends and family to help you with your landscaping project. You can always bribe them with the promise of a free lunch or plan to reciprocate the help on one of their projects. Diane had her son and nephew both helping out (and they both claimed they wanted to be there!).
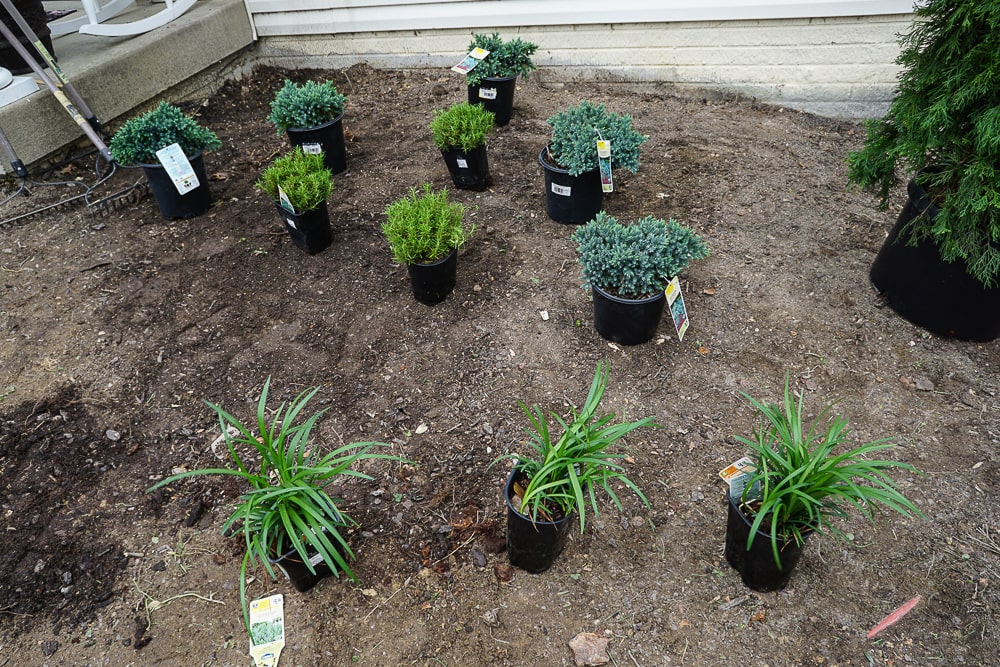
4. Outline your planting beds.
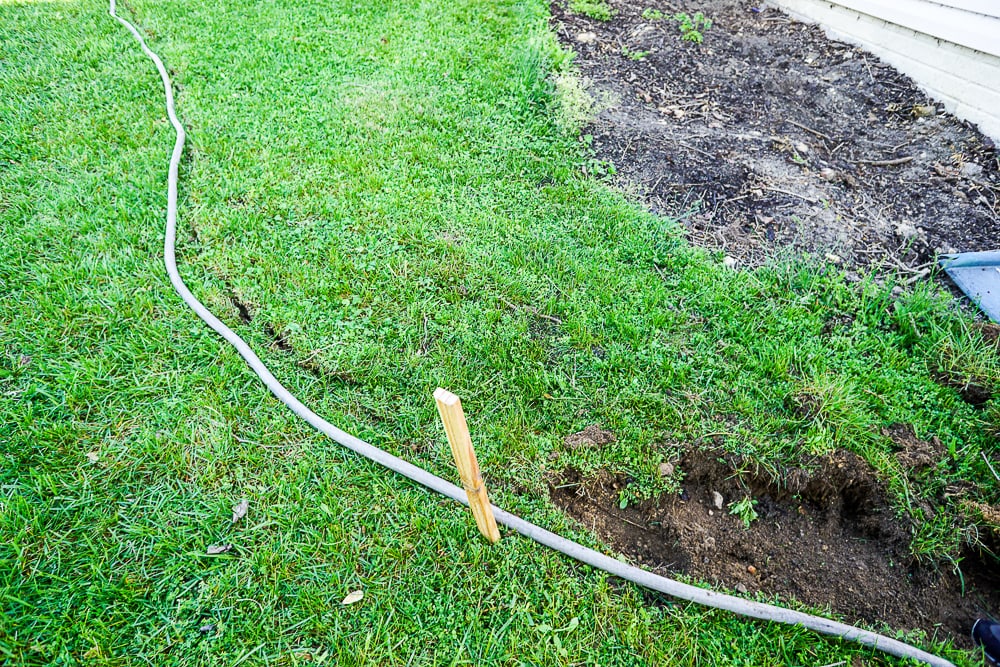
Once you’re ready to begin, you’ll probably start by preparing your landscaping beds. Before the team arrived, Diane removed the old bushes from her beds but there was still plenty of work to be done. The team starting by placing stakes in the yard and using Diane’s garden hose to create a rough outline of the new beds. This made it easier when it came time to remove the existing grass (arguably, the hardest part of the job).
TIP: Use a shovel to cut and dig squares of grass from the new beds. Turn it over and knock off the old dirt and use it as sod in another part of the yard! If you don’t need any sod, you can also use a pick axe to chop away little bits of grass at a time.
5. Prepare the beds.
Whether you’re looking to amend the soil of the entire bed or just where the plants will be placed, a good foundation is key. Use a wheelbarrow to create an ideal planting mixture made from 2 parts top soil, 2 parts manure, and 1 part peat moss. Add bone meal for nutrients and pearlite to help with drainage and you’ll allow your plants to start off right.
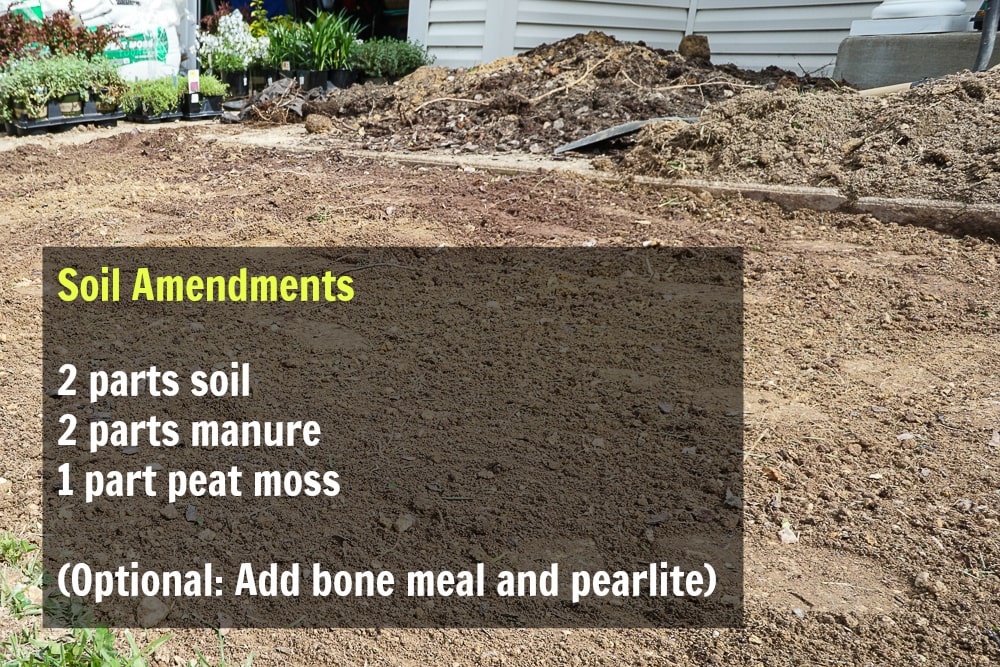
TIP: After adding your soil amendments to the bed or the planting hole, sprinkle with water to remove any air from the mixture. This will prevent your plants from “settling” when you water for the first time.
6. Place your plants in the bed.
This step is simply to provide a visual of where you want your plants and to see how well your landscape design comes to life. Although Diane had all of the plants that she wanted, we ended up moving quite a few things around for the right spacing, color, and visual effect. Remember #2 – be flexible!
TIP: Before you dig, take your plant and rotate it in the soil or use a small shovel to draw a circle around it. When you remove the plant to dig your hole, you’ll know exactly where it needs to go!
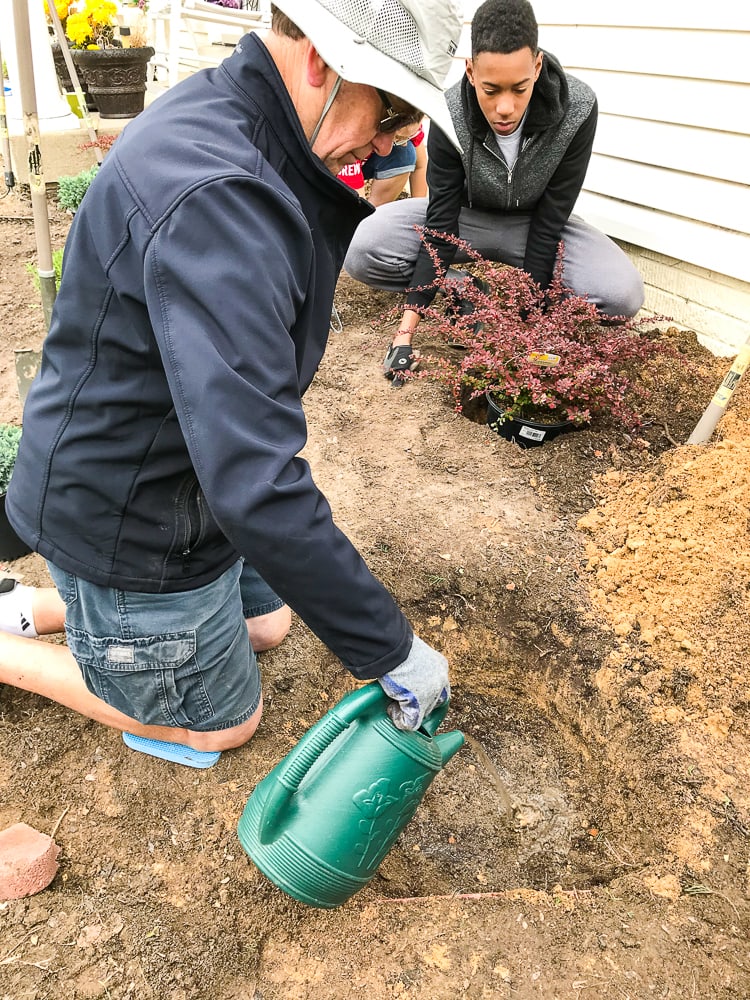
7. Time to plant!
This can be a short or long process depending on your soil and the quantity of your plants. Diane’s soil was a mixture of clay and sand so some areas required a post hole digger and others were fine with a shovel.
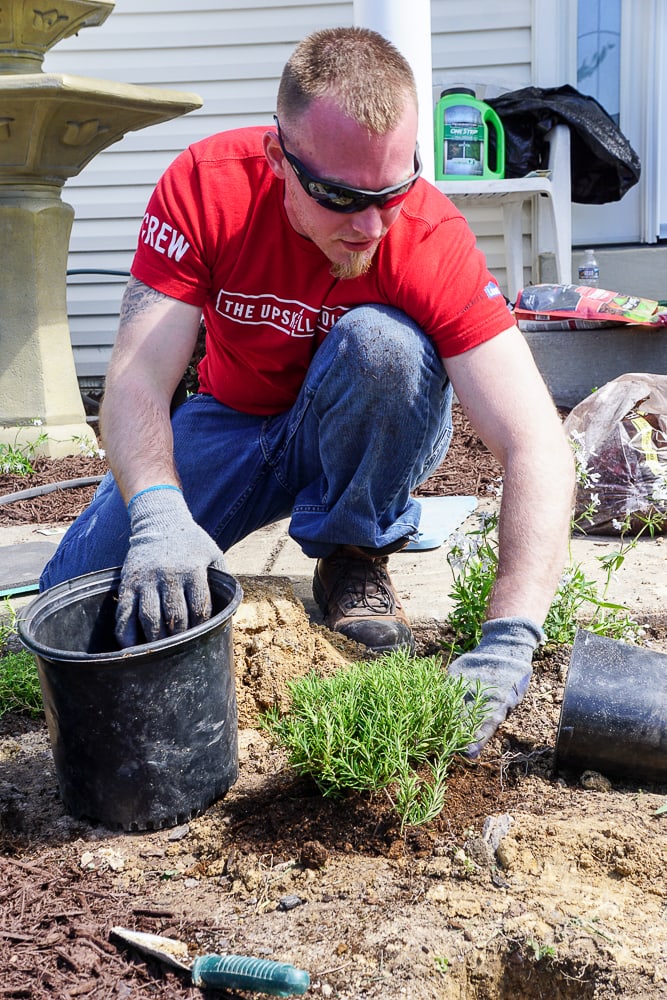
TIP: Unless you’re dealing with dense red clay, you only need to dig the plant hole about as deep as the existing pot and just a few inches wider. Break up the roots of the plant and place it in the hole atop the soil amendment.
8. Add your garden accents.
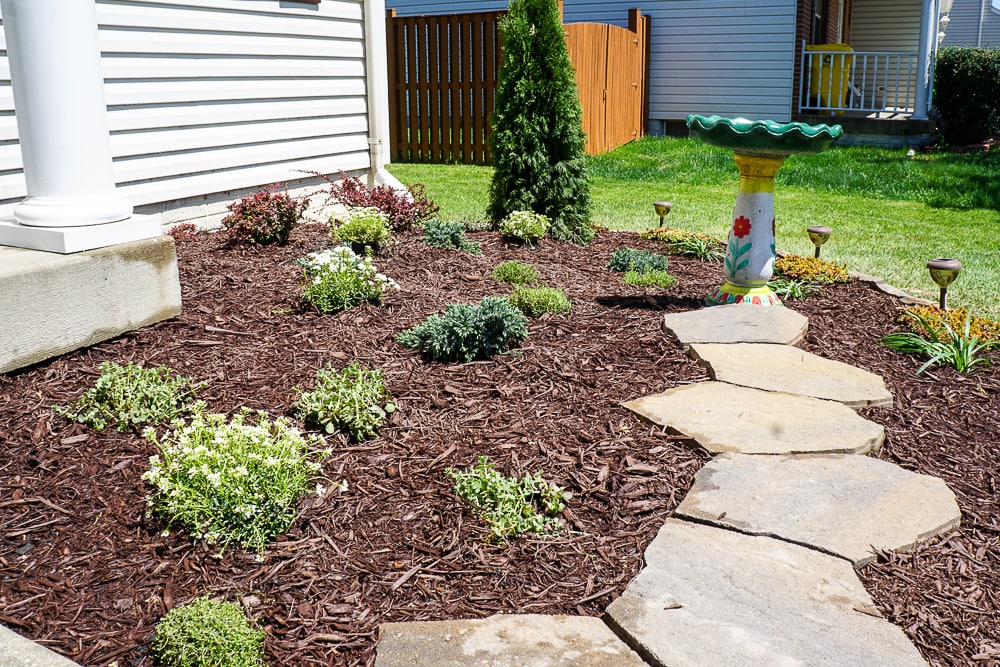
Diane didn’t just want plants; she wanted an outdoor space. To create definition, she added natural colored edging stones to the perimeter of the bed and a few patio stones to give her access to her birdbath. And beside her porch, one of her favorite places to sit outside, she placed a lighted fountain.
TIP: Make necessary outdoor accessories more attractive by “hiding” them in the open. Diane purchased a hose pot that looks decorative but easily stores her hose making it easy to water her new landscaping.
9. Mulch it all!
Mulch isn’t just decorative. It helps suppress weeds and maintains moisture in the soil. Diane chose a dark brown mulch that matched her home colors but also provided a contrast to the green of the plants and the flowers in the bed.

10. Get creative. Get inspired.
The conclusion of the project wasn’t the end for Diane. It was the beginning! She’s already purchased the materials to expand and revise another bed she has in the front yard. And she took me around back and started talking about her grand plans for the corner of the yard.
She now feels confident and inspired to work on more projects and has already been enlisted by her next door neighbor to help with their landscaping. And Diane knows she now has a team of friends at her local Lowe’s store that are passionate about helping.
Want some more tips?
Here are a few things I picked up from the Lowe’s team just by listening in on all their conversations!
- Instead of watering your plants with a sprinkler, buy a few soaker hoses and bury them around the plants, just beneath the mulch. The water will sink into where it’s needed most – the roots!
- Always water in the morning! Watering in the heat of the day will cause a lot of evaporation and watering at night can cause fungus.
- Call before you dig! Even though the gas and electric companies had already visited and marked the gas and electric lines, we still ran into several wires in the beds. Dig gently and by hand!
- Be careful with weed barriers. Diane had used some in one of her beds and while it kept the weeds out, it also kept her tulips from blooming!
And you can watch it all come to life right here!
Diane’s landscaping looks great! It really is empowering to see them all “dig” in and get it done the proper way.
I see what you did there 😉 After spending 2 days with Diane and team, I realize my beds were in need of a little refreshing too. I feel so much more knowledgable!
I “dig” it! Your flower beds are pretty! I don’t have a green thumb at all. But I admire those that do!
HA HA! Look, I’ve had a brown thumb for years but I keep trying and every year, my beds look better and better!
I’m such a gardening newbie and seriously feel like I can do this now! With working, kids, and activities, I’m often of the mindset to just “pay someone else and they’ll do it.” But of course that’s pricey. We’ve been talking about pepping up our front yard FOREVER and keep putting it off. Well, I’ve been watching your IG videos and reading this and I’m so gung ho now about getting it done! I’ve been pinning ideas to Pinterest, researching, and making a plan. We’re tackling some of it this weekend. Thanks for bringing landscaping down to MY LEVEL and making me feel like I can actually do this!
I’ve been working on the yard for year and even *I* got inspired. I spent Saturday at Lowe’s learning new skills (there are furniture painting projects in my future!) and I even got everything I need to fill in my beds and revitalize my vegetable garden. WE CAN DO THIS! We’ll use Instagram to hold us accountable 😉
A real-life look at DIY landscaping, honest and motivating! What would you say is the most beginner-friendly landscaping project to start with?