This post is sponsored by Pillsbury. All thoughts, opinions, and content are my own. Enjoy!
I have a secret confession to make.
I LOVE PILLSBURY CRESCENT ROLLS!
Why is that a secret? Because generally, I don’t incorporate a lot of bread into my life. And I’m mostly okay with that. I’m not one of those OMG, I would DIE without bread. Now, talk to me about pasta and that might be a different story.
So, yes, all carb talk aside, Crescent Rolls are my go-to when it comes to any big fancy meal where I feel like fancy bread is required.
Whoops! That’s another reason I like to keep it a secret. When it comes to big fancy meals like Thanksgiving and Christmas dinner, I do my best to make everything from scratch. Even the cranberry sauce. When my family asks for, prefers even, the frozen boxed pies and canned jellied cranberry sauce, I shun their requests and I make it all from scratch. Except for the bread.
I have no qualms about pulling out that can of Pillsbury Crescent Rolls, peeling off that wrapper, and gently pressing that spoon against the seam until I can’t take the anticipation anymore and the can goes POP! And it still scares me every time.
But I have another confession to make and this one is not a secret.
YOU CAN USE CRESCENT ROLLS FOR MORE THAN JUST DINNER ROLLS.
I know, right?
And my very favorite deviation from the dinner roll classic is one of my signature recipes, baked brie. It’s one of my signatures because it’s so freaking easy and you can change it up a million different ways. So here you go.
MAKE-IT-YOUR-OWN BAKED BRIE
The best part is that you really only need three ingredients (four if you’re feeling adventurous)
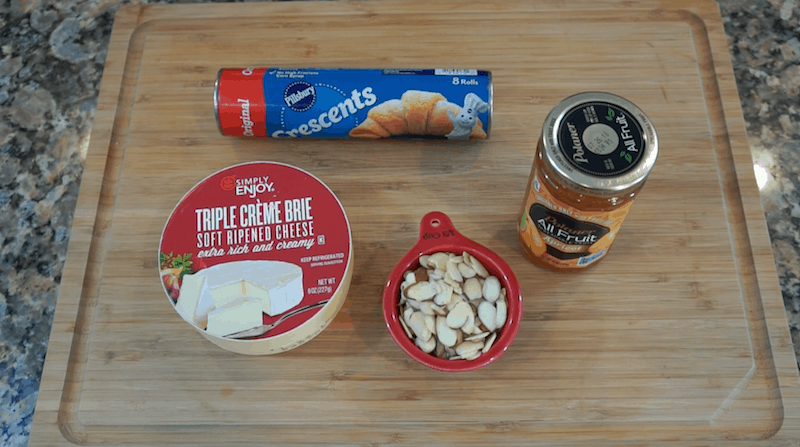
Ingredients for Baked Brie
1 can (8 oz) Pillsbury™ Crescent Rolls
1 wheel (8 oz) brie
1/4 cup fruit preserves
1/4 cup nuts (optional)
You can buy Original or Reduced Fat Crescent Rolls but if you’re going to be eating a big wheel of cheese, I don’t see the point in reducing the fat. Now, speaking of fat, I prefer to buy Triple Creme Brie. It’s higher in fat but it’s oh-so-smooth and I find the rind tends to be thinner.
Speaking of the rind, DO NOT REMOVE IT. I’ve read where people “just don’t like the taste” and they remove it. Trust me when I say the rind holds it all together and once baked, is barely even noticeable. Plus I make fun of people who don’t eat the rind. If you don’t like the rind, you haven’t spent enough money on your cheese.
As for the preserves, here’s where you can get creative. I prefer to use Polaner All Fruit which is all fruit and sweetened only with fruit juices – no sugar or high fructose corn syrup. And it comes in about a million flavors. I usually use raspberry or blackberry but I got crazy this time and used apricot. You can even use honey or, for a festive holiday touch, whole berry cranberry sauce.
As for the nuts, it’s a personal preference. If you’re using almonds, like I did, you’ll probably want to lightly toast them so they keep some crisp. But feel free to use pecans or walnuts or omit them all together!
Some people even toss in a little brown sugar and nuts and leave out the preserves. That’s just crazy talk in my book.
Okay. Got your ingredients? Prepared to make it your own? Good. Because here come the directions.
Directions for Baked Brie
Preheat the oven to 350 degrees.
Line a baking sheet with parchment paper.
Open the can of Crescent Rolls and separate the dough into two separate rectangles.
Place the dough onto a piece of parchment paper or a lightly floured surface and use your fingers to seal all the seams that you would normally use to separate the dough into triangles.
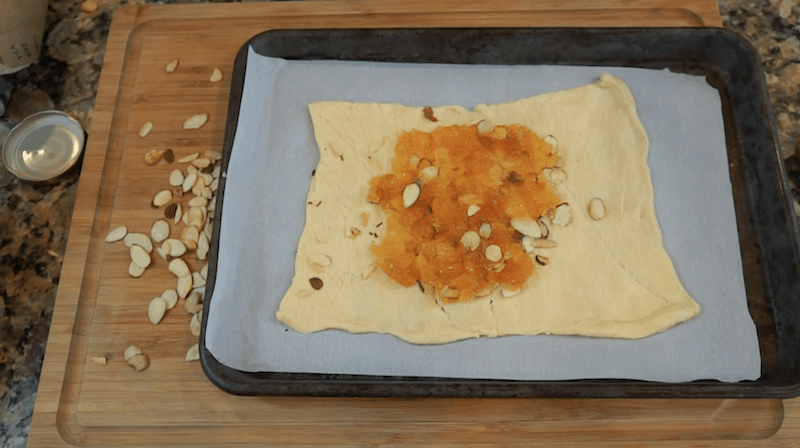
On one of the rectangles, spread about 1/4 cup of your fruit preserves and use the back of a spoon to spread it around in a circle in the center of the dough. Add the nuts, if desired.
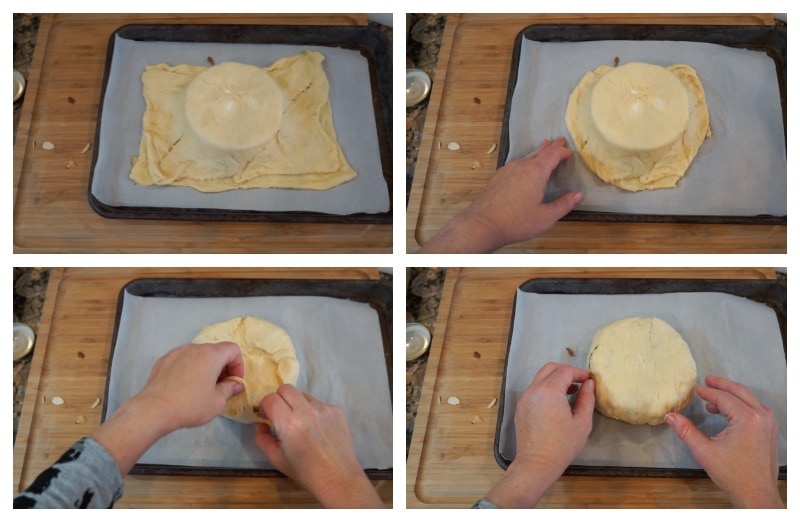
Place your wheel of brie in the center of the dough and top with the second rectangle of dough. Seal up all of the edges, trim away the excess dough (keeping it in reserve), and fold all of the edges onto the top of the wheel. Finally, turn the wheel over so the seam side is down.
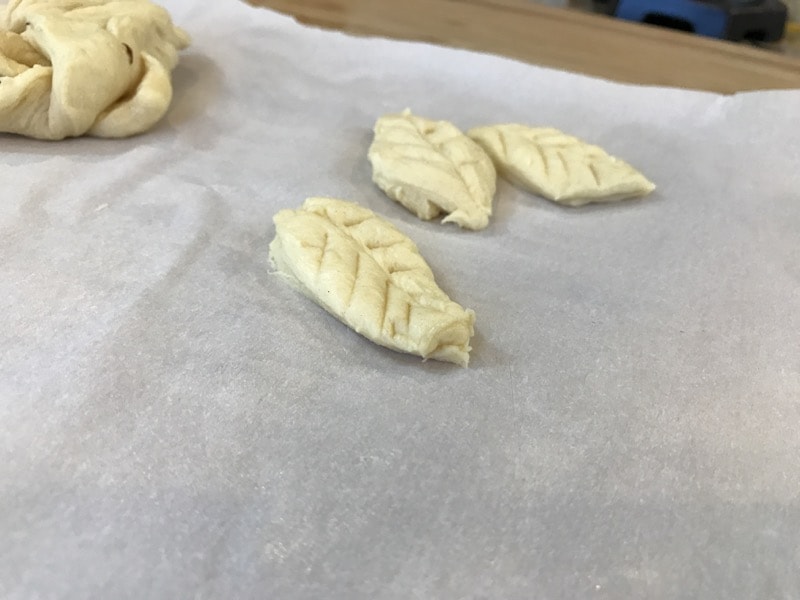
Now comes the fun part! You get to decorate the top with all the excess dough. Think of all the possibilities! You can make an Easter egg, a Star of David, a pumpkin, a birthday candle, a flower… really it’s up to you and your imagination (and the dough).
Around the holidays, I like to go with holly leaves and berries, mainly because it’s easy.
Once you have everything assembled, there’s one last optional step but it’s worth it if you want your Baked Brie to look picture perfect.
Create an egg wash (I usually beat together an egg and a teaspoon of water) and brush the entire surface of the dough.
Finally, pop it in the oven for about 24 minutes and pull it out when it’s golden brown.
READ THIS – IMPORTANT!
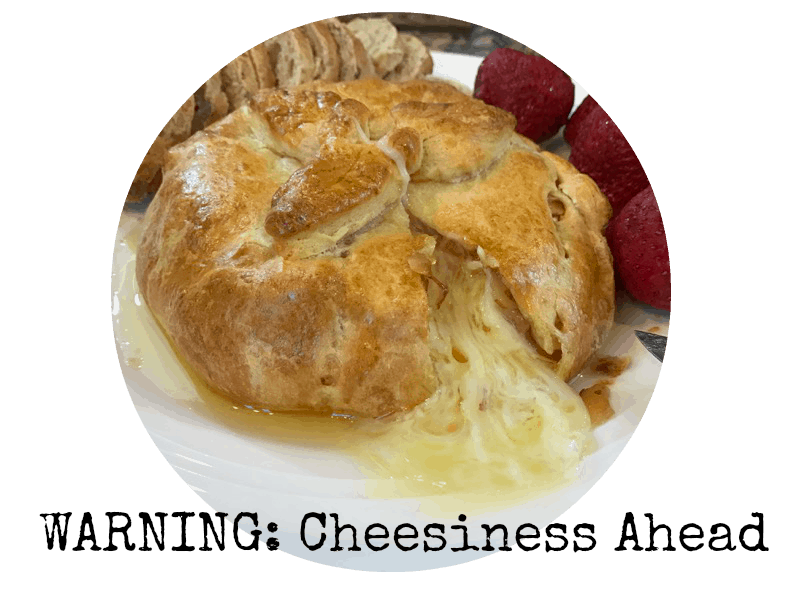
When your baked brie is finished, it’s going to look so beautiful that you and everyone around you is going to want to dive right in.
DON’T DO IT! Not only will you have various burns in your mouth and on your tongue (because, hello, that gooey mess just came right out of the oven), but you’ll also have a plate of liquid cheese.
As tempting as that sounds, you’ll want to wait at least 15 minutes to let the brie cool. Some people let it cool up to an hour but who has patience like that?
Finally, slice a little wedge with a sharp knife and serve with bread, crackers, fruit (like apple slices), or eat it Fadra-style… straight up with a fork.
See? I told you it was easy. And delicious. And it can be our little secret.
And just in case you’re not sure exactly how to do it all, I’ve made a short little how-to video to help you out.
Hope you enjoy a little cheesiness today! To get more ideas about how to incorporate baking season into your holiday season, check out some of these great Pillsbury ideas!

Ingredients
- 1 can (8 oz) Pillsbury™ Crescent Rolls
- 1 wheel (8 oz) brie
- 1/4 cup fruit preserves
- 1/4 cup nuts (optional)
Instructions
Preheat the oven to 350 degrees.
Line a baking sheet with parchment paper.
Open the can of Crescent Rolls and separate the dough into two separate rectangles.
Place the dough onto a piece of parchment paper or a lightly floured surface and use your fingers to seal all the seams that you would normally use to separate the dough into triangles.
On one of the rectangles, spread about 1/4 cup of your fruit preserves and use the back of a spoon to spread it around in a circle in the center of the dough. Add the nuts, if desired.
Place your wheel of brie in the center of the dough and top with the second rectangle of dough. Seal up all of the edges, trim away the excess dough (keeping it in reserve), and fold all of the edges onto the top of the wheel. Finally, turn the wheel over so the seam side is down.
(Optional) Decorate the top with all the excess dough.
(Optional) Create an egg wash by beating together one egg and a teaspoon of water. Brush the entire surface of the dough.
Bake for about 24 minutes and pull it out when it's golden brown.
Let sit for 15 minutes before enjoying!



I almost can’t handle the beautifulness of this post!
Every once in a while, I can pull something together! 😉
The waiting is the WORST!!! I made this a LONG time ago, and now you have inspired me to make it again . . .hello weekend!
I made this for Thanksgiving it was wonderful and so easy! Thank you for sharing.