If you’re reading this, it’s because you’re on a quest to figure out if you can do a DIY staircase makeover. And you’re probably wondering, like I did, if you have the time, the talent, and the knowledge to do it. And you’re probably obsessively reading every article and watching every YouTube video. Like I did.
So what do I have to add that’s new? I’m assuming that you’re like me and you’re not a home improvement expert but you have some skills. And armed with the right knowledge, you’re not afraid to try.
I’M SO PROUD OF YOU! Because you can do this. I’m going to take you through my entire process step by step INCLUDING MY MISTAKES so that you can avoid them.
In so many articles and videos, they tell you “then apply the stain” but you really have no clue how to do exactly that.
So buckle up and get ready to change your stairs!
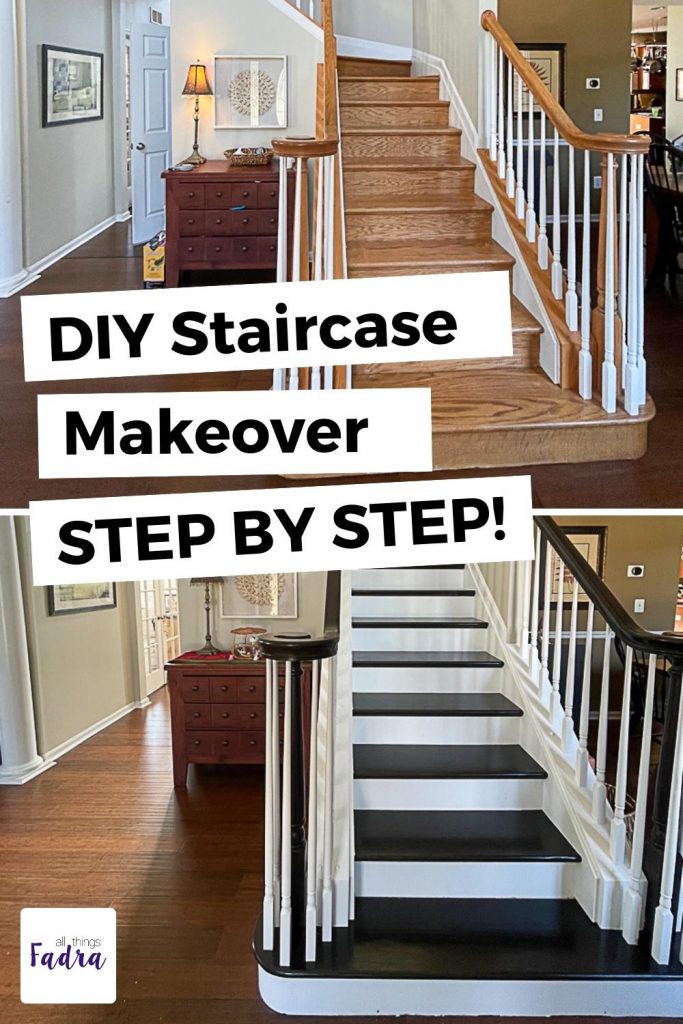
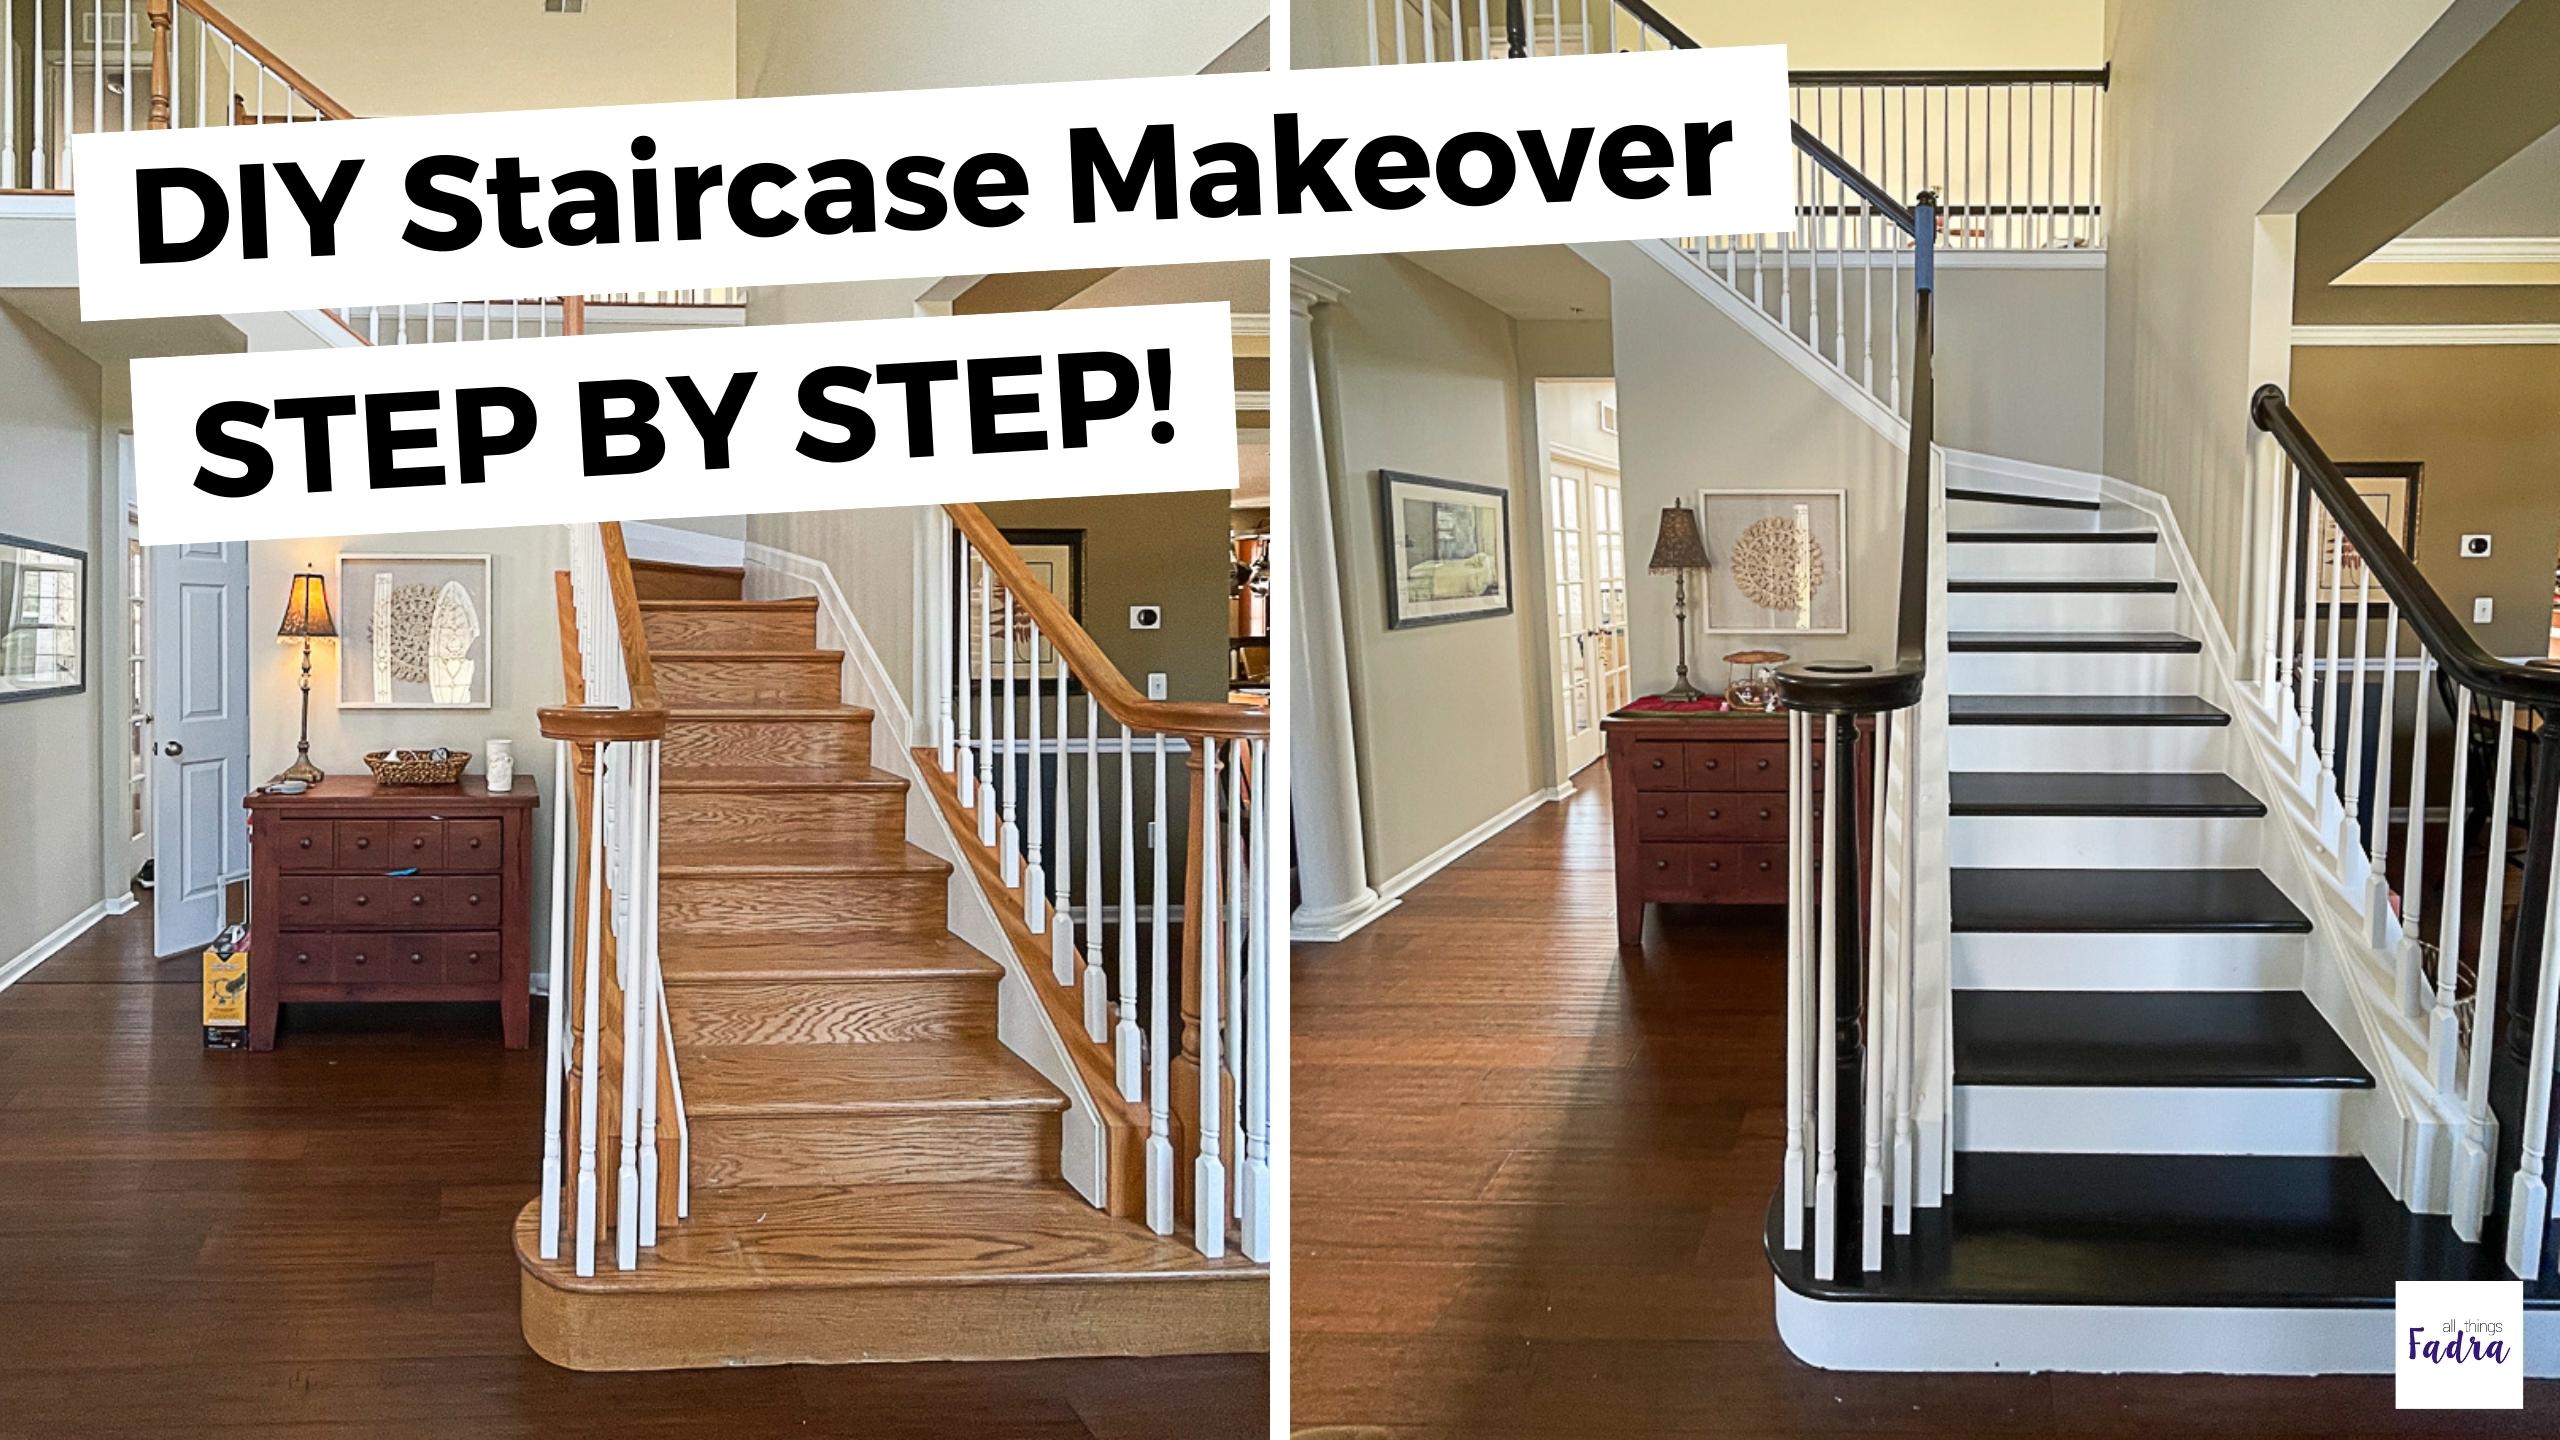
BEFORE the Staircase Makeover
We essentially bought a spec home when we moved in 10 years ago. That means it was new construction but we didn’t get to pick anything out. As a result, we ended up with floors that I would have never picked – namely butterscotch engineered hardwood floors. But because they were new, we tolerated them.
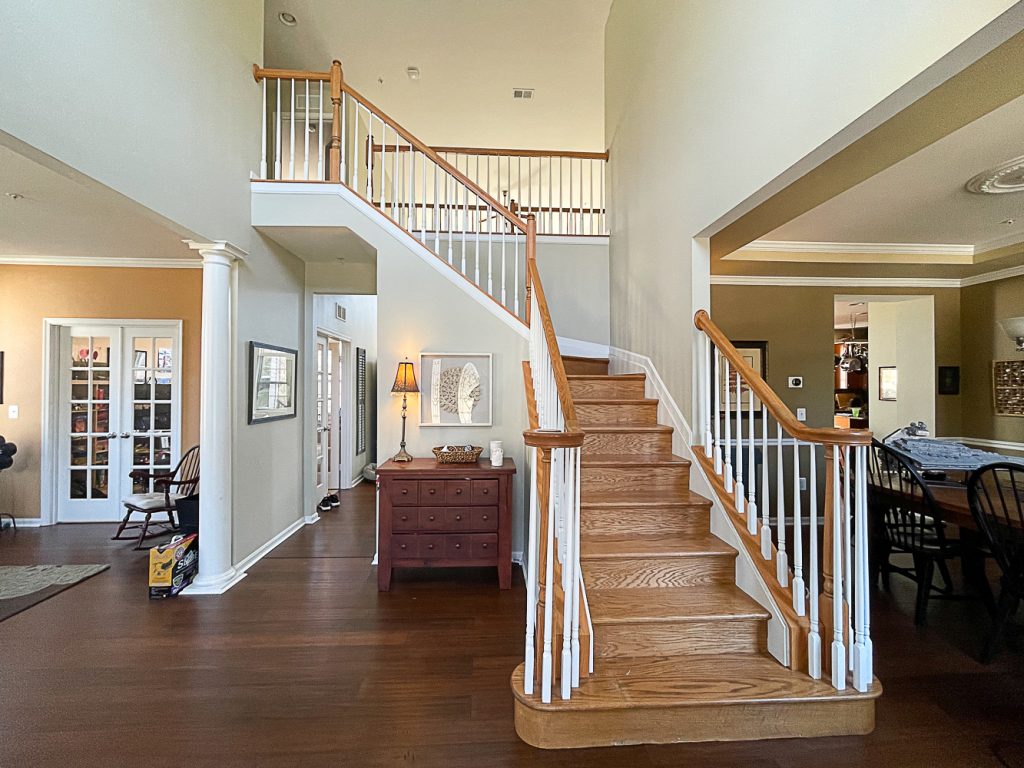
Eventually, after enough pet encounters, we decided to rip up the bit of carpeting we had and the hardwoods and install dark bamboo floors. Although they aren’t without their own issues, they are extremely durable and great for pets.
We installed the floors and I loved them. But they didn’t match our stairs or railings. And the idea of making it match and the incredible scope of the project seemed so overwhelming. But I desperately wanted to change the style and I didn’t want to pay thousands of dollars for someone to do it.
My goals: get the look I want with easy to use products that didn’t require massive amounts of sanding. And I’m happy to say, I achieved exactly that and here’s how you can too!
5 (Sometimes) Easy Steps for this Project
- PREP
- SAND
- STAIN
- FINISH
- PAINT
There’s a lot of preparation involved in getting the stairs ready for the makeover. And it’s made easier if you map out the order of operations for your project. The way I’ve done it minimized mess and still allowed us to use the stairs (even if lightly and/or sporadically on a daily basis).
This project was completed over the better part of five weeks but a lot of that was “hurry up and wait.” In other words, you’ll spend a lot of time waiting for coats to dry.
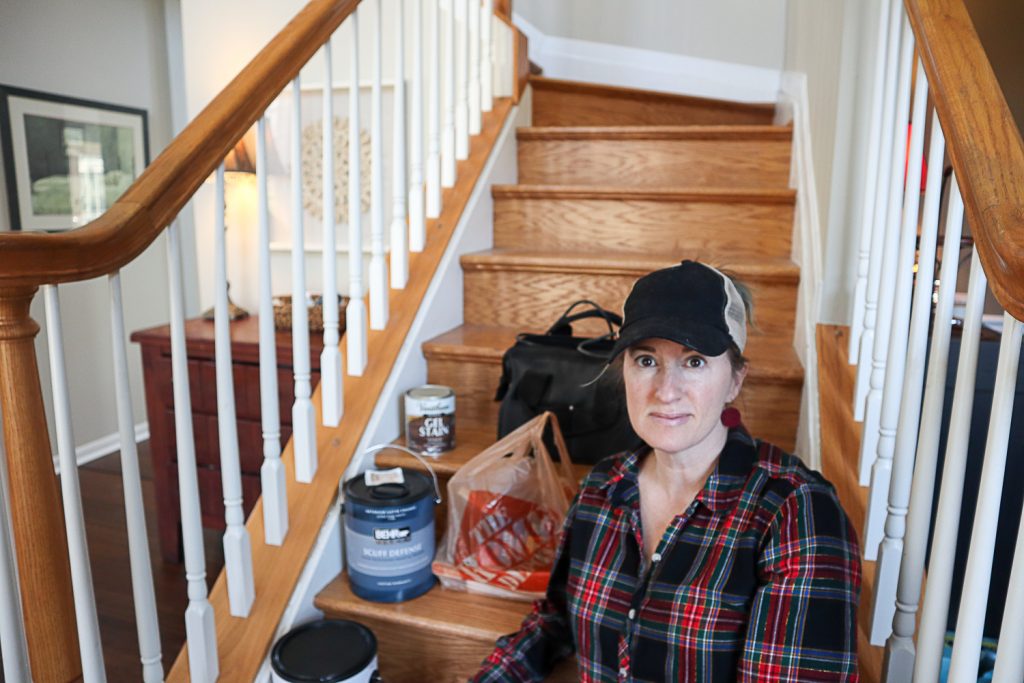
But let me not get ahead of myself. Let’s start with the supplies you’ll need.
Supply List
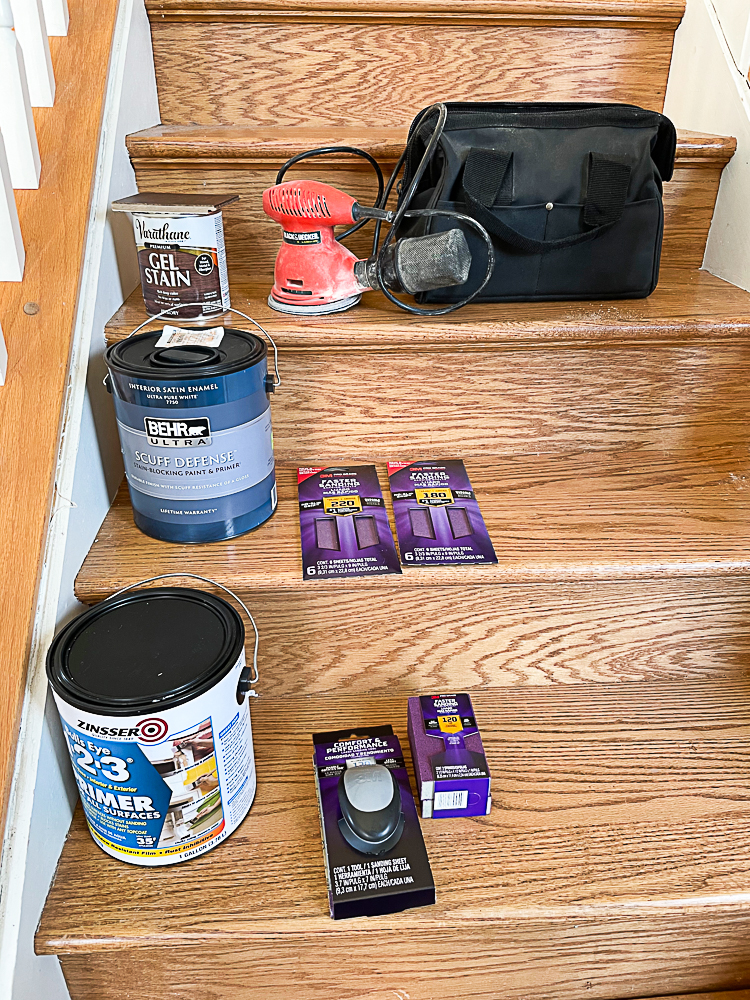
Below are all of the supplies I used over the course of this project. Some are necessary and some are just nice to have. And some won’t be needed at all if you don’t have some of the scenarios that I did. Some of these are affiliate links which means I make a small commission at no cost to you if you purchase through my link. But many of these supplies can be found at your local Home Depot or Lowe’s Home Improvement.
- Staple puller (useful if you need to remove carpet staples from your stairs)
- Caulk and caulk gun
- Caulk remover
- Orbital sander
- Sanding blocks and sandpaper
- Painter’s tape (Frogtape is the best!
- Rags (I bought a bag of painter’s rags but you can use old t-shirts or even socks)
- Foam brushes
- Stain brush (I like this Linzer brush)
- Paint brush (High quality! I use Purdy or Linzer)
- Gel Stain (I recommend Varathane Gel Stain)
- Mineral spirits (needed for stain clean up)
- Lambswool applicator (cut to size)
- Plastic trays (use disposable paint trays)
- Floor finish (I really like the Varathane Water-Based Floor Finish. I used this cheaper one on the railings and this more expensive finish for the stair treads, which get heavier traffic)
- Primer (Zinsser or Kilz are good brands)
- Paint
- Latex gloves
I tend to stick to brands that I find at my local Home Depot, like Behr paint, and I like the quality of their brands. You can really shop anywhere but don’t scrimp on the quality of materials. Trust me on this!
HOW to do a Staircase Makeover – VIDEO
If you’re ready to dive in and just need someone to show you how, I’ve got you covered. I spent weeks (months?) putting this video together and you can tell there were a lot of nights and weekends involved. But I show you step by step exactly how I tackled this project including all the mistakes I made so you don’t make the same one!
If you need to see it all spelled out, I’ve got you covered there as well. Read on!
PREP your stairs
Once you’ve got your supplies ready, you need to prep the stairs. Your level of prep will depend on the condition of your stairs. We had previously removed the carpeting, cleaned it up, and removed the staples. It’s good to plan for stopping points along the way so you can pause the project if you need to.
Make sure everything is clean and dust-free. Now is a good time to look at what might need repairs (think wood filler) or replacing (think shoddy caulk). Our caulk was dried and cracked so I removed it and did a light sanding on the trim.
SAND your stairs
This is not as daunting as it sounds. Remember you aren’t attempting to achieve bare wood. That’s the beauty of primer and gel stain. It takes a lot of the heavy labor out of this project.
Use a finer grit sandpaper (220 is good) to just remove a good portion of the finish. You don’t have to get all of it off. You just want to create a rough texture for the stain or paint to adhere to.
For larger areas, like the stair treads, I used the orbital sander which made quick work of finish removal. I even used it on top of the rails.
For the rest of the areas, I use a sanding block or a flexible sander to get in all the crevices. Sanding the railing is not fun. It’s tedious but just remember that you’re trying to rough it up, not strip it down.
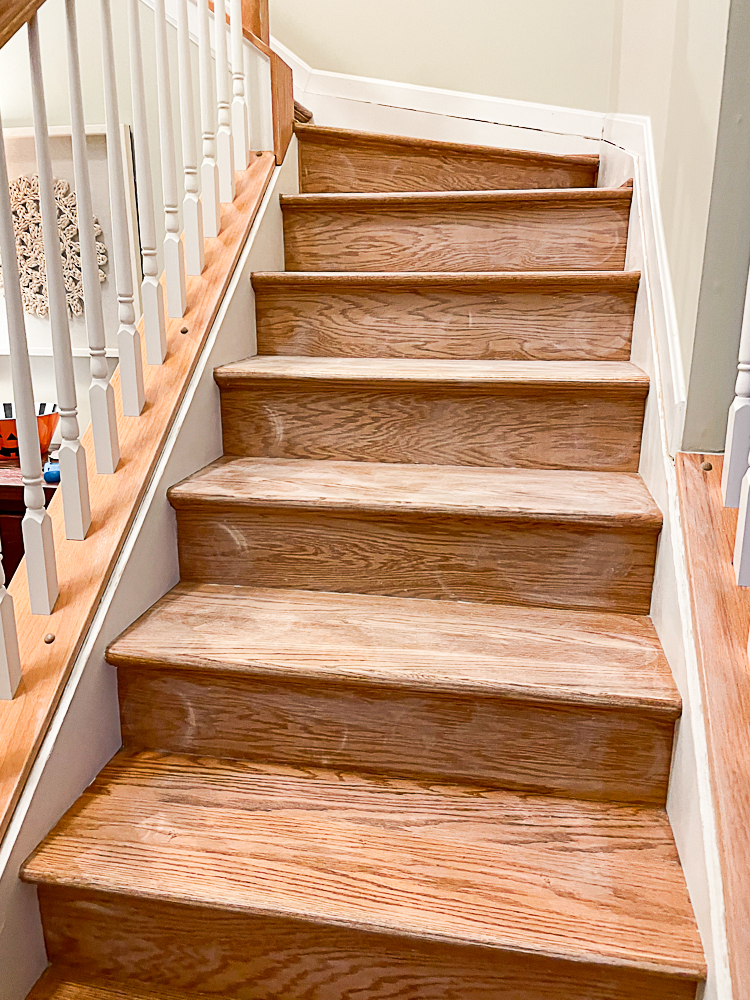
Once you’ve finished all the sanding (and I do recommend doing this in one step so you don’t run the risk of dust later on in the project), thoroughly clean the surfaces. You can vacuum but you’ll also want to use a damp rag with probably one or two passes.
STAIN your stairs
And now you’re ready to start staining already! See how easy that was? BUT WAIT ONE SECOND.
There’s more prep work to be done here. You’re going to want to apply tape around any area that ISN’T going to be stained. This requires more brain power than you think. I isolated the treads and taped off the tops of many, many, many, many ballusters near the railing. I didn’t have to tape the bottoms for this project because I knew I’d be painting the bottom, not staining.
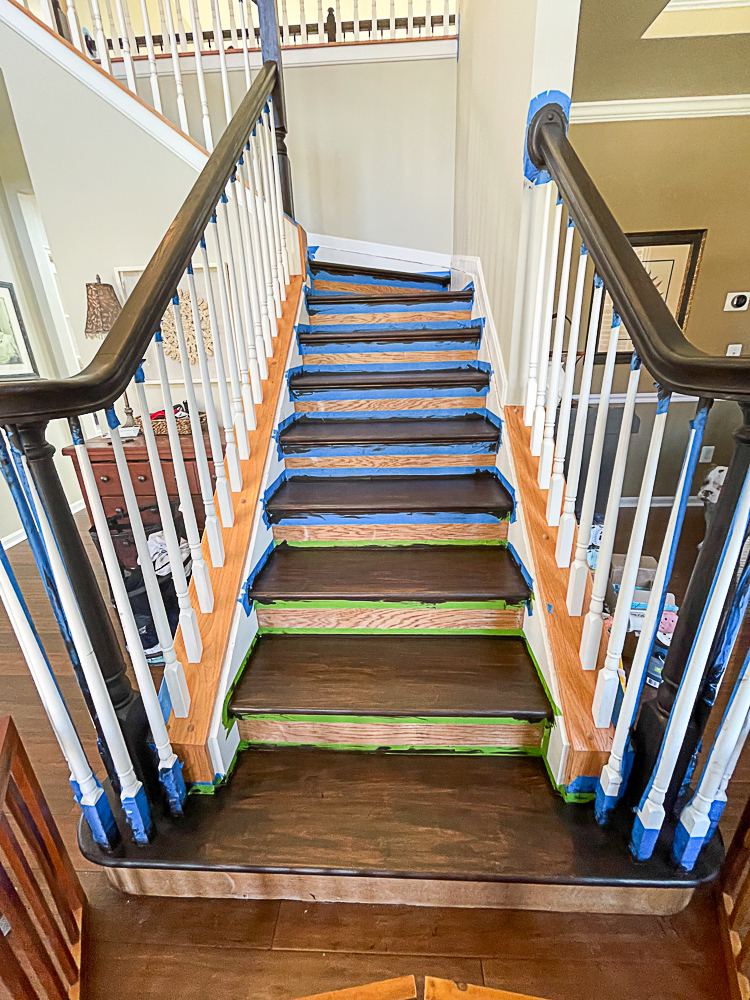
First things first. Wear latex gloves. And change the gloves every so often as the stain will eventually get through (they are somewhat porous). Gel stain is oil based and does not clean up with soap and water. Wear old clothes and protect your hands. And if the weather allows, open some windows because oil-based products create a lot of fumes.
Also, before you start and get stain where you don’t want it and start freaking out, have your mineral spirits handy. If you get stain on an area that you don’t want, usually a little mineral spirits on a rag will wipe it right off (as long as you don’t let it sit for too long).
To start staining, make sure you gently stir the gel stain, just like you would a can of paint. To apply it, I recommend that you take a clean rag, dip it into the stain (either in the can or in a small pan), and using two fingers under the rag, start to gently wipe it on the wood. Imagine that you’re using your fingers as the paintbrush.
Don’t apply it too thickly and don’t wipe it off. Some people use a sock for this as well.
Let it dry according to the manufacturer’s instructions (mine took about two hours) and do the next coat. You’ll probably need two to three successive coats applied in the same way. (If you watch my video, you’ll see all the mistakes I made with application).
Once you’ve stained everything, stand back and take a few minutes to be proud of yourself. That was a lot of work. It wasn’t incredibly hard work but it was a LOT of work.
I was able to lightly walk on the surface in my socks after two hours but only because I had to go upstairs to bed.
When the stain has completed dried, you’re ready to do the top coat.
IMPORTANT: I used an oil-based stain and a water-based finish. You’ve heard that oil and water don’t mix, right? That’s okay. You can use both types but you want to make sure the stain is fully dry so that it doesn’t repel the finish. Wait at LEAST 72 hours before starting the finish coat.
FINISH your stairs
If you thought things looked good already, wait until you put the finish coat on!
I used a water based finish because I wanted lower odor and shorter drying times. It’s super important that you pick a high quality finish though. I’ve used Varathane for years but I know a lot of people also use General Finishes.
I specifically bought a finish for floors. Floors, and stairs especially, really take a beating so you want something that’s durable. I also picked a satin finish and I wouldn’t go much shinier than that or else you’ll be sliding down your stairs.
You’ll want to gently stir the finish but not too vigorously as you’re trying to avoid bubbles (bubbles are the enemy in finishing!). I poured it into a disposable paint tray and let the bubbles settle.
Using a lambswool applicator, gently dip into the finish and wipe over your surfaces (railing and treads for me). I then used a brush specifically for stains and finishes go back and gently smooth over any bubbles right after it was applied.
The finish dried so fast that I was able to apply four coats in one day. Again, don’t get lazy. More coats = more durability. Even though you want to be done, add the extra coats to protect your gorgeous stairs.
Once the finish has thoroughly dried, you can remove the tape. It’s getting exciting now!
You might be ready to jump right into painting but DON’T. And let me tell you why.
The top coat is dry but it isn’t cured yet. You might be able to lightly walk on it but you’re going to need to tape it off for when you paint the white part of the stairs. And you do NOT want to put tape on that gorgeous finish until it’s ready.
If you need to take a break, now is a good time to do it. Take a couple of days off. Then get back to your final step!
PRIME and PAINT your stairs
Just when you’re ready to get this project done, you have to go back to the tedium of taping. Trust me on this. It will make your life so much easier and give you the clean lines you want and deserve.
This time you’ll be putting the tape on your gorgeous treads so that you can prime and paint. Please take my advice and splurge on the green Frogtape. There is no substitute.
Unfortunately, I had a lot of blue painter’s tape to use so I had both. The blue tape actually pulled up the finish in a few spots that I had to repair (I might have cried a little) and gave me a little paint bleed. If you do have to use the blue tape, maybe try the delicate finish tape.
Once you’re taped, you can begin priming. Primer will not look good. It’s thicker than paint and can be hard to work with. But it’s necessary. It will keep the wood grain from showing through and will give the paint a surface to adhere to. One coat might suffice but I ended up needing two.
After priming, you know what to do. Get that painting done! I painted some of the trim as well as the bottom of the railings and all of the stair runs. It definitely took two coats but when it was dry and the tape came off, it was MAGICAL!
AFTER the Staircase Makeover
In all the project took me about five weeks. My sister did come and help me with some of the tedium but I completed 85% of the project completely on my own.
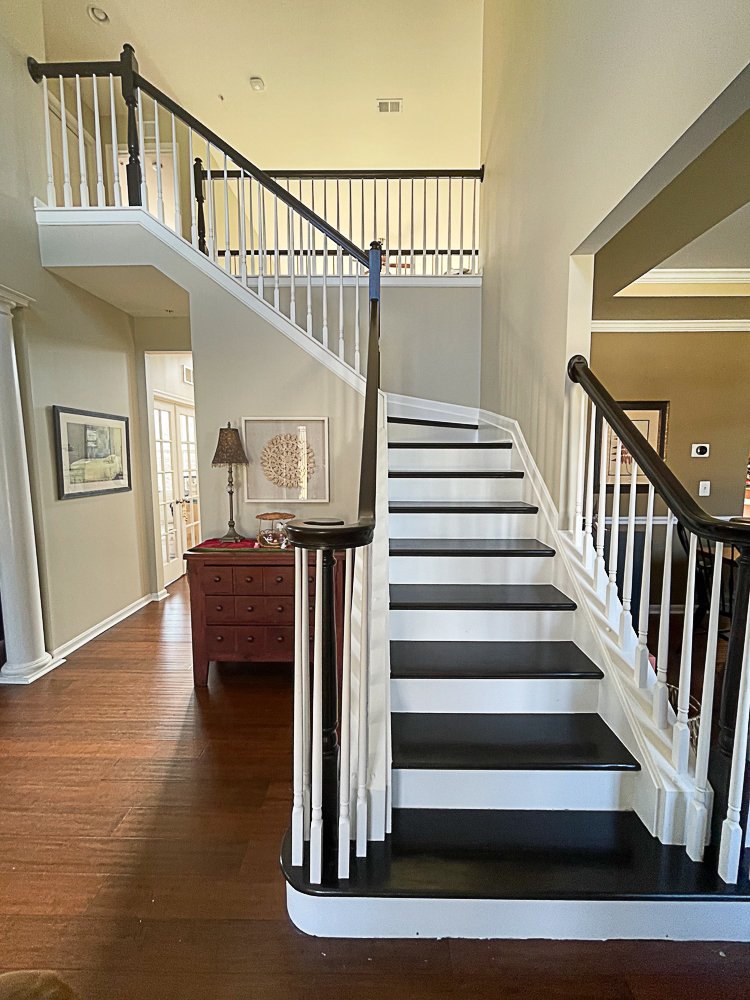
I did run into a lot of problems. Carpet got in the way. Caulk was hard to remove. I messed up the stain application and then switched to a much darker color. I had paint bleed. I had to fix scratches. Yeah. That’s just how DIY home improvement projects go.
Don’t plan for perfection. You won’t get there. But you will be satisfied with a job well done that looks good and saves you a fraction of the cost!
I didn’t have a budget for this project and we already had some of the more expensive supplies, like the orbital sander. But with everything else, I ended up spending under $300 and I’m thrilled!
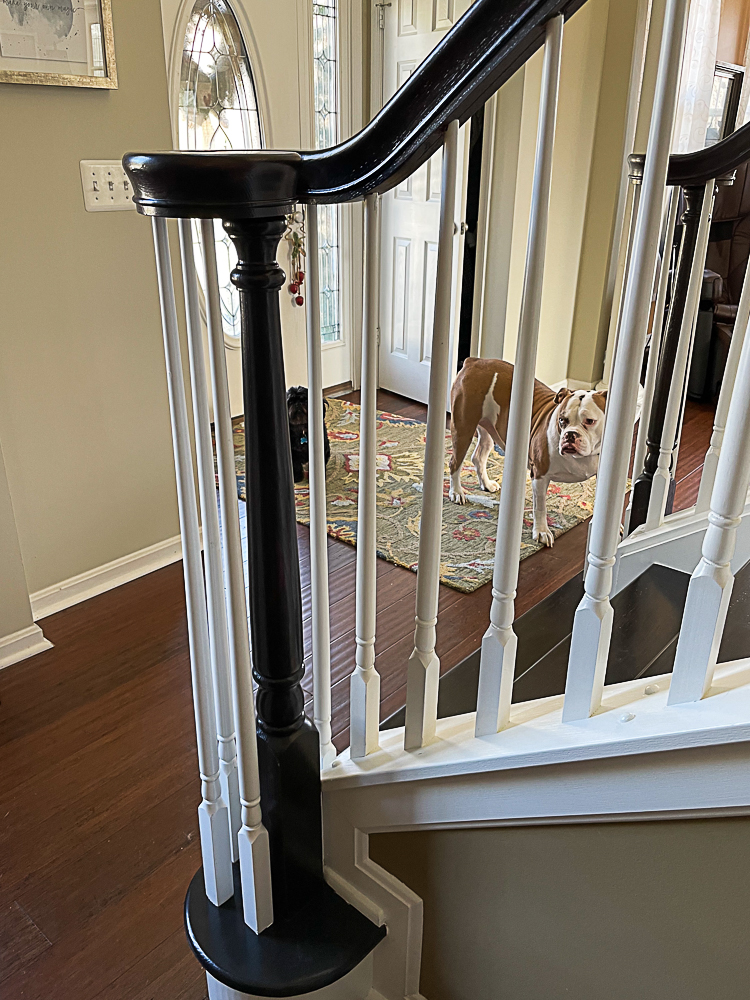


Can you share the color gel stain you used ?
To me, it looks like Kona. Beautifully done!
Hello,
Did you use java or kon stain? You mentioned java in video but you linked kona in the links.